") English (UK)
English (UK) 


Simple tool to repair frequent boot problems.
Easy-to-use (repair in 1 click!)
Free (GPL open-source license)
Helpful (Boot-Info summary to get help by email or on your favorite forum)
Safe (automatic backups)
Can recover access to Windows (XP, Vista, Seven, Eight).
Can recover access to Debian, Ubuntu, Linux Mint...
Can recover access to any OS (Windows, MacOS, Linux..) if your PC contains Debian, Ubuntu or derivative.
Can repair MBR-locked OEM computer boot if the original bootsector has been saved by Clean-Ubiquity
Can repair the boot when you have the "GRUB Recovery" error message
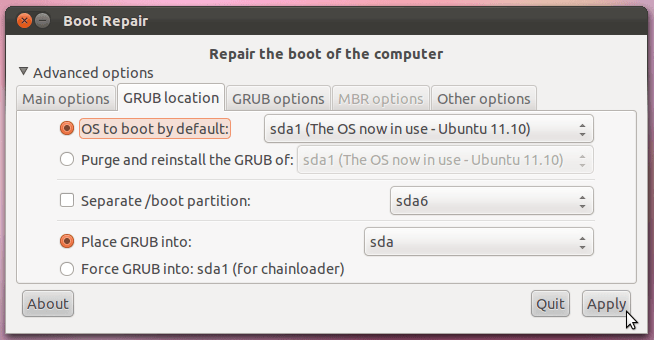
Options to reinstall GRUB2 bootloader easily (OS by default, purge, unhide, kernel options..)
and much more ! (EFI, SATA, filesystem repair...)
GET BOOT-REPAIR:
Three possibilities to get Boot-Repair:
1) Boot-Repair-Disk is the official CD containing the very last version of Boot-Repair
2) Boot-Repair is also included in all Ubuntu Secured CDs and many other distributions (Hybryde, AriOS, PinguyOS...)
3) Boot-Repair can be installed & used in Debian and derivatives (Ubuntu, Linux Mint...), either normal session, or live-CD, or live-USB.
Boot-Repair can be installed & used from any Ubuntu session (normal session, or live-CD, or live-USB).
Install Boot-Repair on Ubuntu (can be used also live-CD or live-USB)
Open the terminal (Ctrl + Alt + T) and run the following commands (copy/paste -> enter)
-------------------------------------------------------------------------
sudo add-apt-repository ppa:yannubuntu/boot-repair
sudo apt-get update
sudo apt-get install boot-repair
-------------------------------------------------------------------------
After completing the installation you can launch it from System->Administration->Boot-Repair menu if you use Gnome, or search "boot-repair" in the dash if you use Unity.
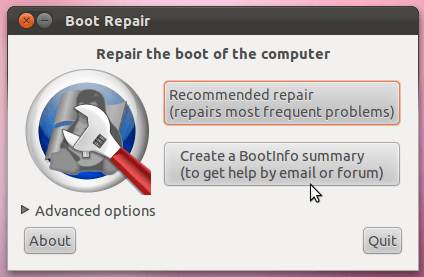
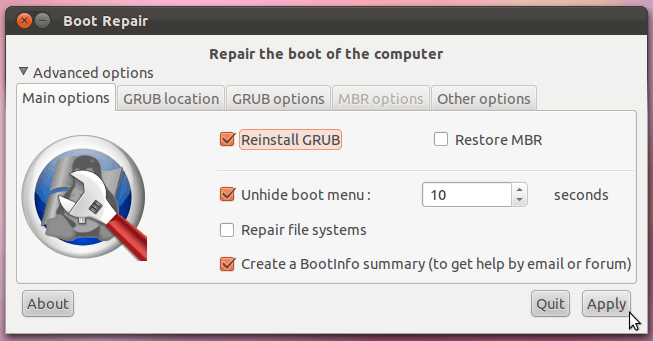
If you deleted Linux partitions (GRUB partition) when you were loged into Windows OS (after Win OS restart you got boot error) then choose "Recommended repair" and Boot Repair will fix MBR (Windows boot partition) automaticly.

")